
SaaS Reports
SCIEThe Reports hub at /app/reports/ lists four SCIE report types. Each opens its own list, create form, and sign-off flow — without requiring an ERP work order.
| Type | Model | When to use |
|---|---|---|
| Inspection | VisitReport | General site visit — equipment status, call reason, recommendations, photos |
| Fire Pump | TechnicalReport (FULL) | Pump room testing with H-Q curves and hydraulic compliance |
| Simple Pumping | TechnicalReport (SIMPLE) | Pumping checks without H-Q curve measurements |
| Fire Door | FireDoorReport | Door-by-door inspection checklist with photos and corrective chain |
Inspection Report
VisitReportInspection reports capture a technician's on-site visit — what the client reported, equipment inspected, findings, categorized photos, and client sign-off. In the SaaS App they are created directly at /app/reports/inspection/ without a work order.
Routes
| Screen | Route |
|---|---|
| Inspection list | /app/reports/inspection/ |
| New inspection | /app/reports/inspection/new/ |
| Edit existing | /app/reports/inspection/<uuid>/ |
Inspection list
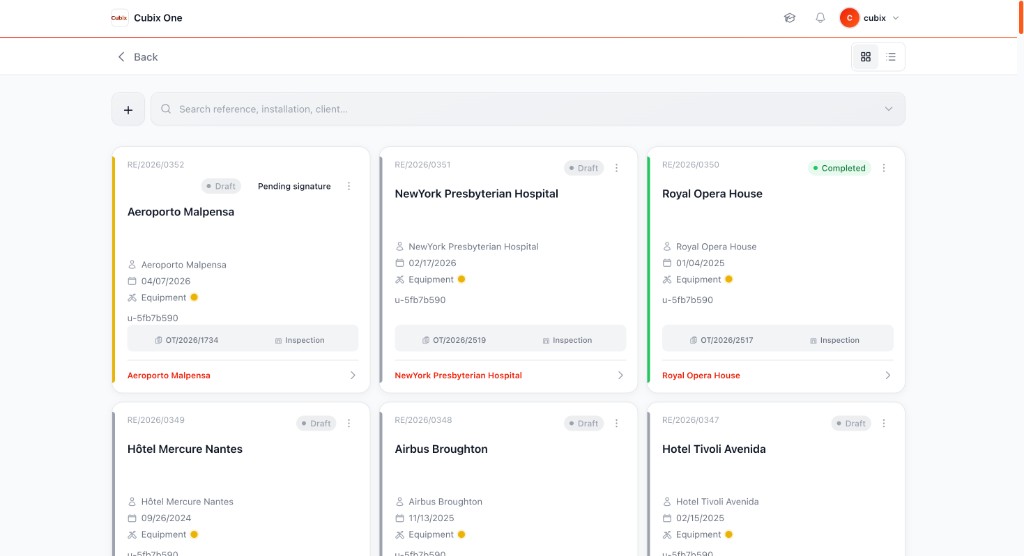
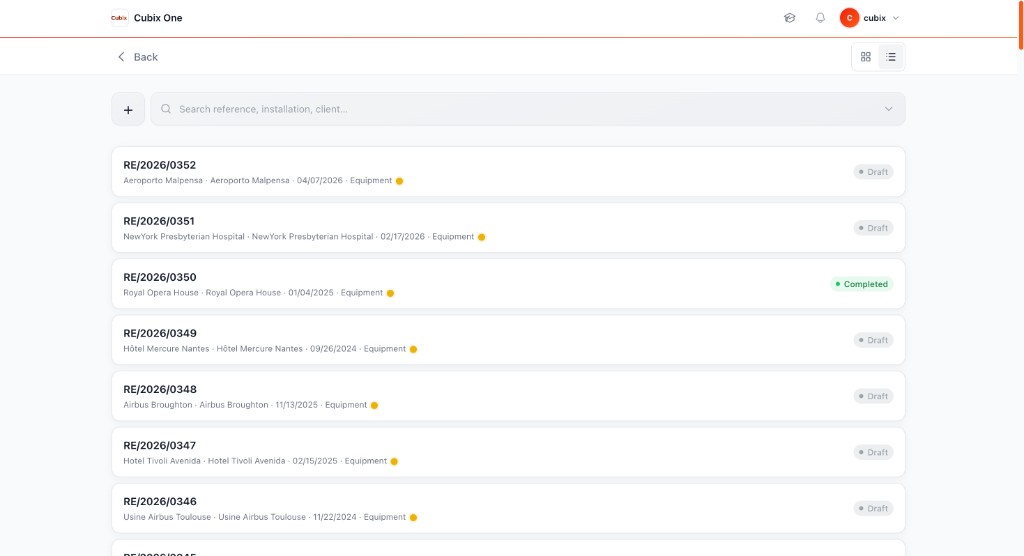
From Reports → Inspection, technicians see all visit reports for the company. The list supports search, filters, and a card/list view toggle — same pattern as Installations and Clients.
| Status | Meaning |
|---|---|
| Draft | Report saved but not yet signed and closed |
| Signed | Technician and client signatures captured; PDF generated |
| Completed | Report finalized and locked for editing |
| Delivered | Signed PDF emailed to the client |
End-to-end workflow
Open the list and tap Add
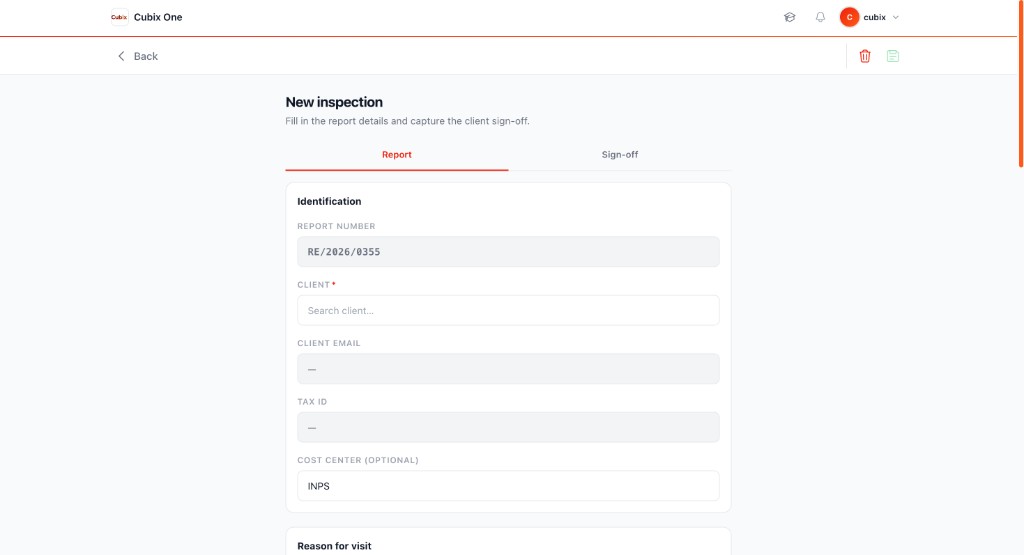
Navigate to /app/reports/inspection/ and create a new report. The form opens with two tabs: Report and Sign-off.
Fill identification and link the site
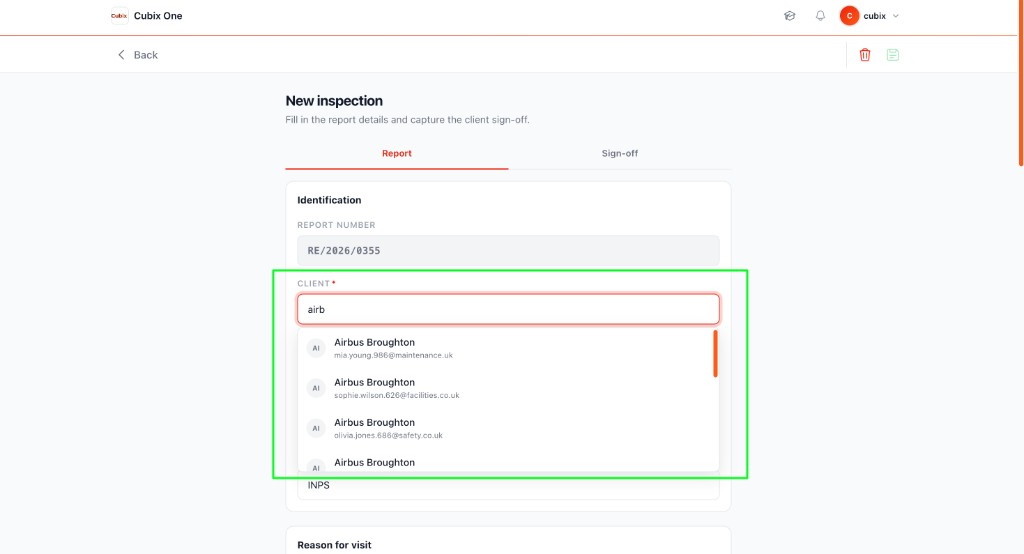
Search and select the client, then the installation and equipment (fire system). Email and tax ID auto-fill from the client record. Report number is assigned automatically.
Describe the visit and findings
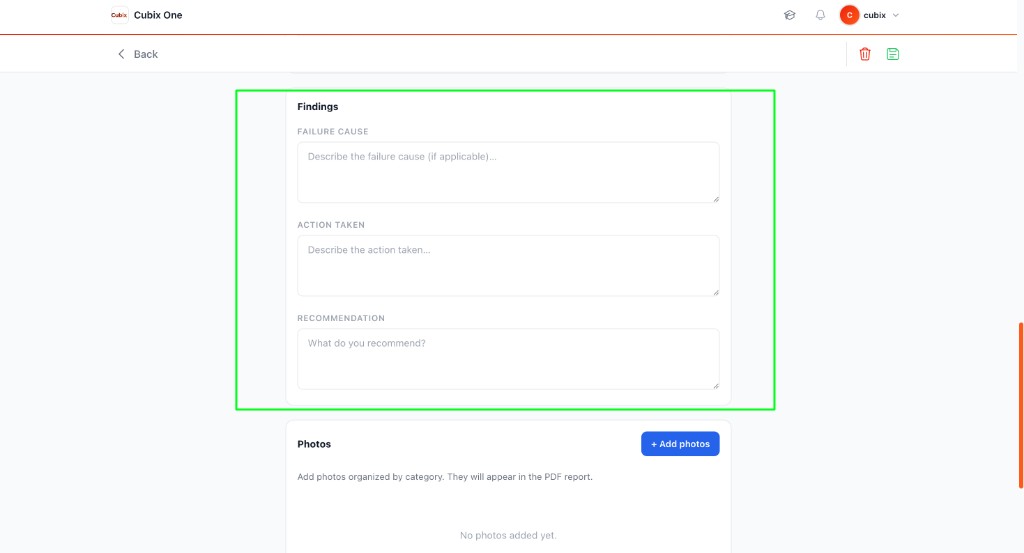
Complete Reason for visit, Service (date, time, technician), and Findings (failure cause, action taken, recommendation). Set severity and equipment status at the bottom.
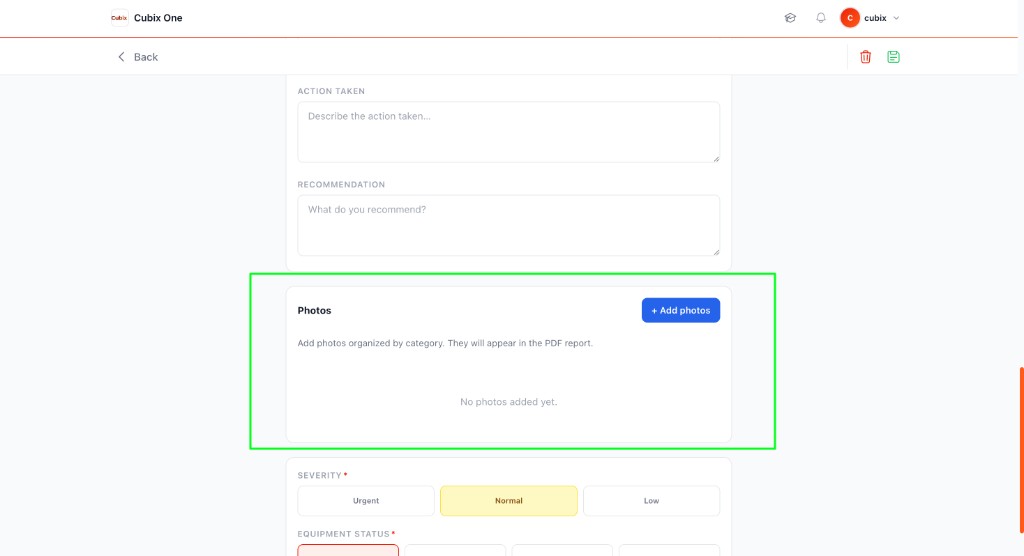
Add categorized photos
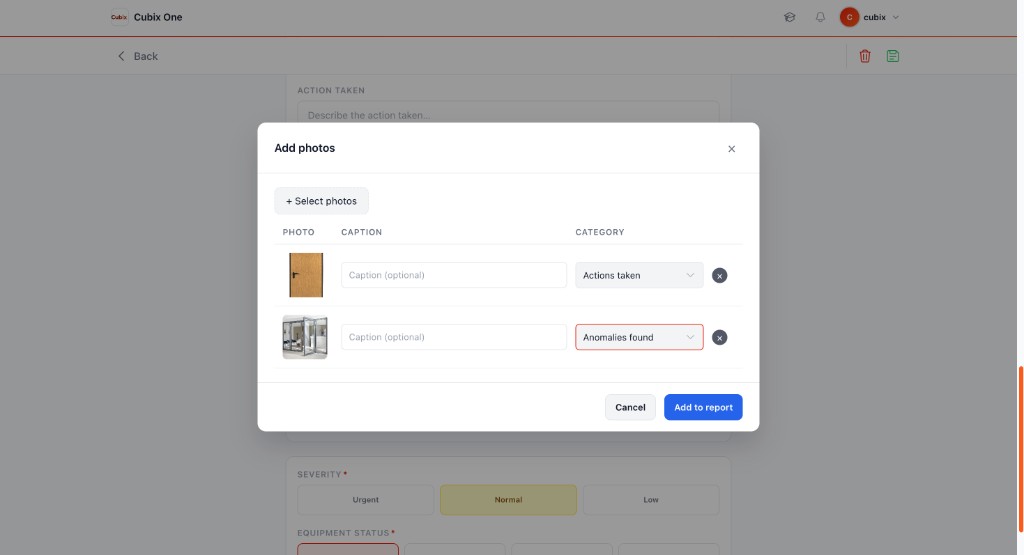
Tap + Add photos, pick images from the device, assign a caption and category for each. Photos appear grouped in the PDF under Anomalies found, Actions taken, or Safety measures.
Sign off and complete
Switch to the Sign-off tab, capture technician and client signatures, then use Sign and close (or Approve when PIN signing is off). The report becomes immutable and the PDF is generated.
Report tab — sections
The Report tab is split into labelled sections. Required fields block Save until client, installation, equipment, service date/time, and technician are filled.
Identification
| Field | Required | Description |
|---|---|---|
| Report number | — | Auto-generated reference (e.g. RE-2026-000123). Read-only preview on create. |
| Client | ✓ | Search contacts by name. Selecting a client resets installation and equipment. |
| Client email | — | Read-only, pulled from the contact record. |
| Tax ID | — | Read-only NIF from the contact record. |
| Cost center | — | Optional. Used for responsibility terms; not printed on the PDF. |
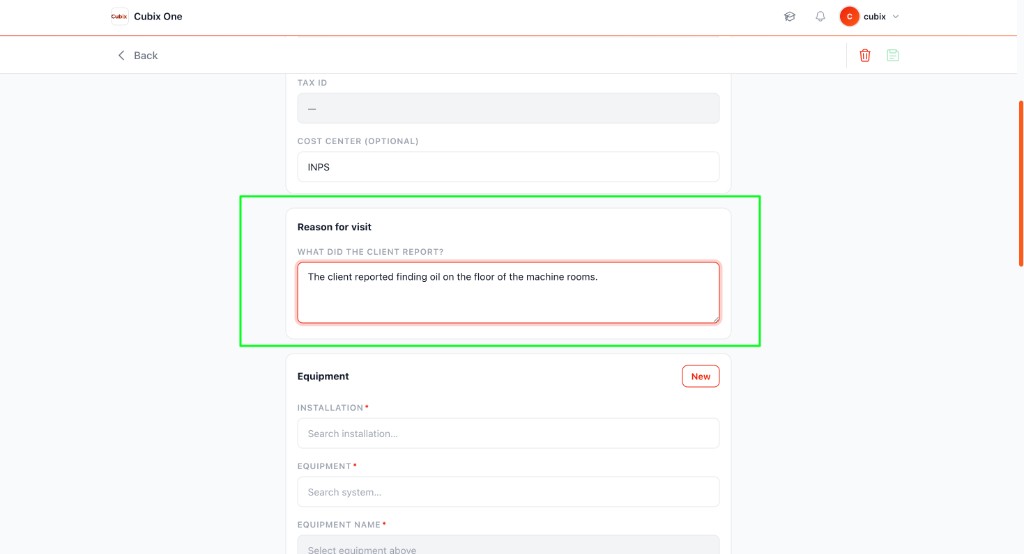
Reason for visit
| Field | Description |
|---|---|
| What did the client report? | Free text — the call reason or complaint before the technician arrived on site. |
Equipment
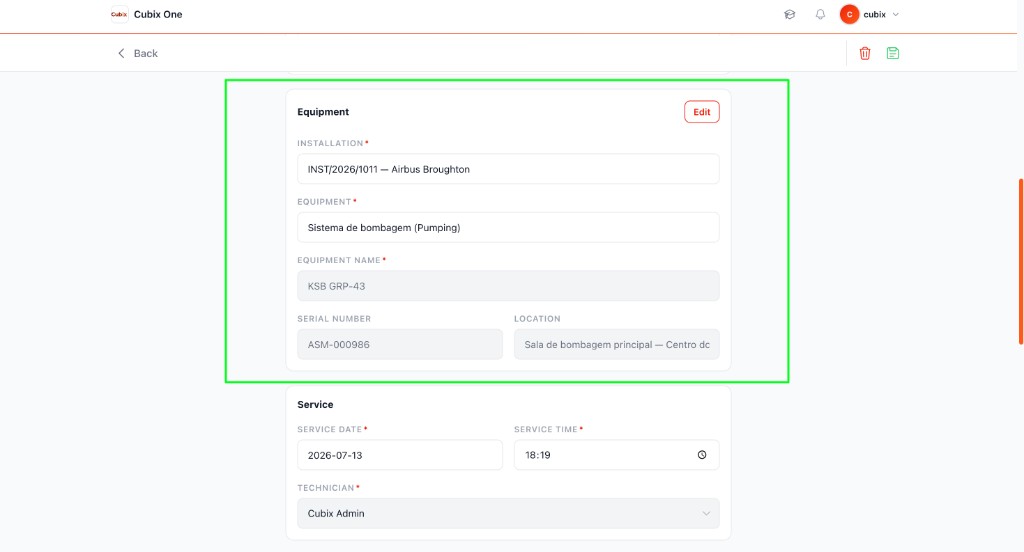
Installation search is enabled after a client is selected. Equipment search is enabled after an installation is selected. Serial number and location are read-only — they come from the selected fire system.
| Field | Required | Description |
|---|---|---|
| Installation | ✓ | Client site — search by reference or name. |
| Equipment | ✓ | Fire system on that installation (type label shown in dropdown). |
| Equipment name | ✓ | Auto-filled from the selected system. |
| Serial number | — | Read-only from installation equipment data. |
| Location | — | Read-only physical location of the equipment. |
Service
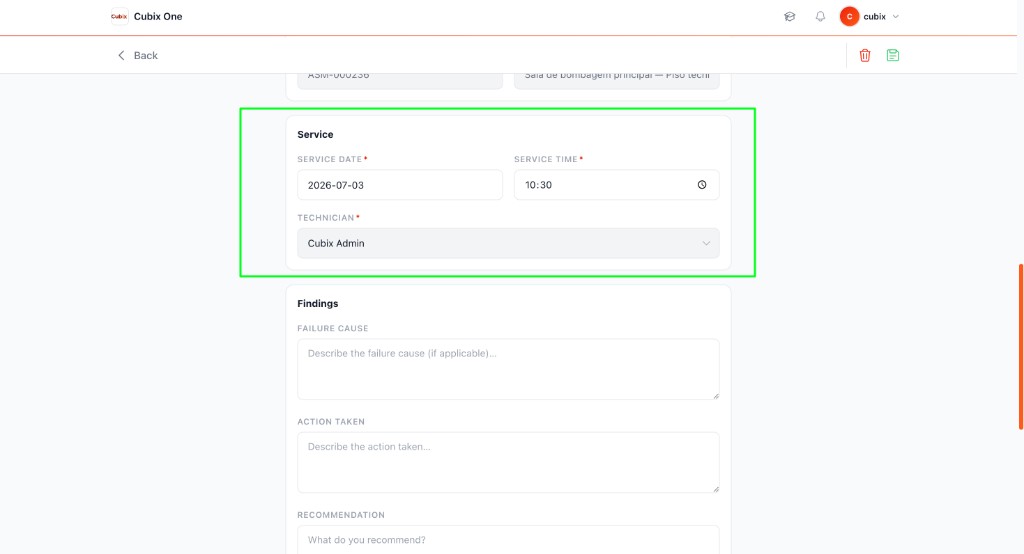
| Field | Required | Description |
|---|---|---|
| Service date | ✓ | Date of the visit. Defaults to today on create. |
| Service time | ✓ | Time work started. Defaults to current local time. |
| Technician | ✓ | Assigned technician. Defaults to the logged-in user on create. |
Findings
| Field | Description |
|---|---|
| Failure cause | What caused the fault or issue, if applicable. |
| Action taken | What the technician did on site to resolve or mitigate. |
| Recommendation | Follow-up advice for the client or next visit. |
Photos
Photos are optional but recommended. Each image is assigned to one of three categories and can have an optional caption. On saved reports, photos upload immediately via AJAX; on create, they are staged until the first save.
| Category | Use for |
|---|---|
| Anomalies found | Defects, damage, non-compliance visible on site |
| Actions taken | Work performed — repairs, replacements, adjustments |
| Safety measures | Isolation, tagging, temporary protections applied |
Severity and equipment status
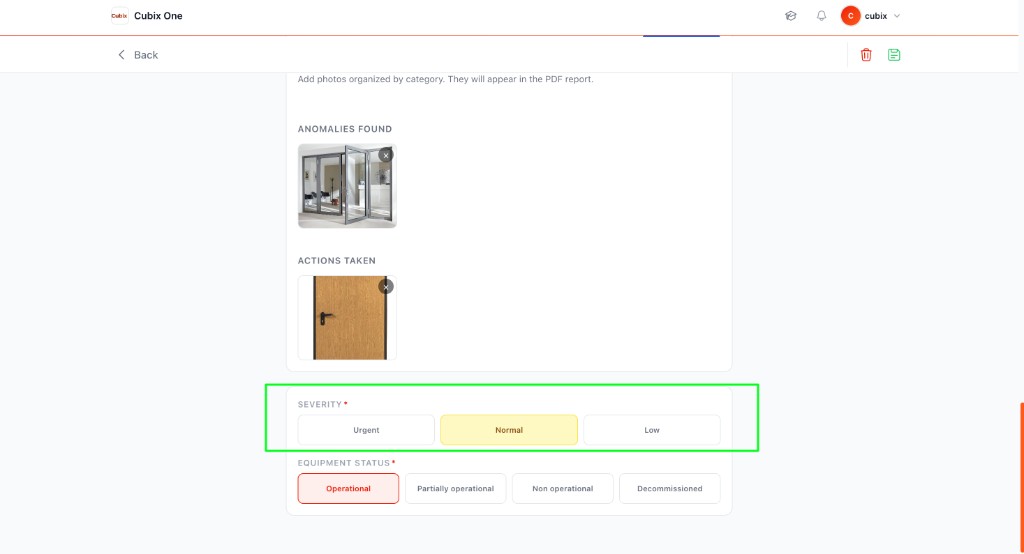
Both fields use large tap-friendly buttons suited for mobile use. Severity defaults to Normal; equipment status defaults to Operational.
| Field | Options |
|---|---|
| Severity | Urgent · Normal · Low |
| Equipment status | Operational · Partially operational · Non operational · Decommissioned |
Sign-off tab
The Sign-off tab has two sections: technician sign-off first, then client sign-off. Signatures are drawn on canvas pads (touch-friendly). When Auto-apply technician signature is enabled in Settings → Reports, selecting a technician pre-fills their saved profile signature.
| Field | Description |
|---|---|
| Technician | Read-only display of the technician selected on the Report tab. |
| Technician signature | Draw on canvas or use auto-applied profile signature. Clear signature resets the pad. |
| Responsible name | On-site client representative name. |
| Client signature | Client draws on canvas before the report is closed. |
After completion — options menu
On a saved report, the gear icon (⚙) in the subnav opens the options menu. Available actions depend on report status and permissions.
| Action | When available |
|---|---|
| Print report | Signed reports — opens PDF with optional responsibility term |
| Print timesheet | When report is linked to a work order |
| Send email | Signed reports — compose email with PDF attachment |
| Sign and close | Draft reports with edit permission |
| Approve | When PIN signing is disabled |
| Duplicate | Creates a new draft from the current report data |
| Cancel | Removes the report from the list (with confirmation) |
Fire Pump Report (H-Q)
Full technical reports include pump room data, measurement tables, H-Q curves, and EN 12845 hydraulic compliance results.
SaaS flow
- Select installation and pump group
- Complete pump room panel and measurement sections
- Review hydraulic compliance badge (compliant / partial / non-compliant)
- Sign off and generate PDF with embedded charts
Simple Pumping Report
A lighter variant of the technical report — same pumping context but without H-Q curve measurements. Use when full hydraulic testing is not required.
Fire Door Report
Door-by-door inspections with checklist items, photos per door, overall compliance status, and optional corrective follow-up reports.
Workflow highlights
- Link installation and fire door system
- Add doors individually with checklist answers
- Attach photos per door
- Overall status: approved, conditional, or rejected
- Email signed PDF to client
Drafts
Reports can be saved as drafts before final submission. Drafts persist form data and photos so technicians can resume after leaving the form.
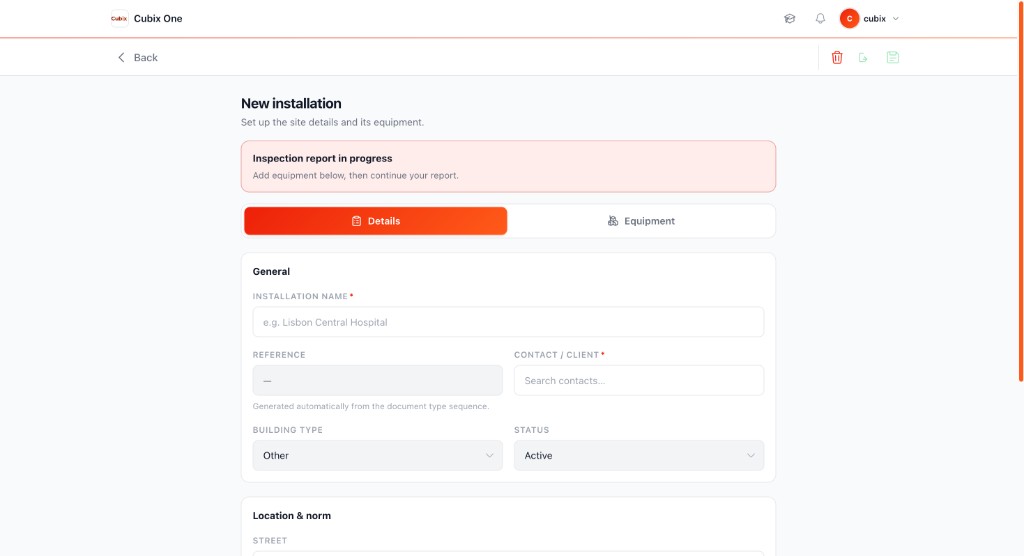
Continue from installation
When a draft exists for an installation, opening that installation shows a Continue report banner with a link back to the in-progress form.
Start a report
Begin filling any report type — draft saves happen automatically or on explicit save.
Leave and return
Navigate away. The draft remains linked to the installation and report type.
Resume
Open the installation or use the draft URL. Complete and submit — the draft is deleted on final create.
Sign-off
The Sign-off tab on every report collects technician and client signatures, applies responsibility terms where configured, and seals the PDF when PIN signing is active.
Signature flow
| Step | What happens |
|---|---|
| Technician signs | Draw or use pre-filled profile signature |
| PIN confirm (optional) | Technician enters personal signing PIN if required by company policy |
| Client signs | On-site client signature on the device |
| Complete | Report status moves to signed/completed; PDF becomes immutable |
Company settings
Administrators control sign-off behaviour from Settings → Reports in the SaaS app (/app/settings/?tab=reports):
- Auto-apply technician signature — pre-fills the technician pad from the user's saved profile signature
- Require PIN to sign reports — enforces cryptographic sealing with a personal PIN; when off, a simpler approve flow applies
- Cost center defaults — per-report-type default cost centers for responsibility terms